


IKEA Maileg Mouse House Hack (with some tips on how to use Maileg wallpaper stickers)

I’ve done a fair few IKEA Flisat renovations in my time. I’ve painted the house different colours, used various gift wraps as wallpaper and even tried my hand at a bit of wall panelling. But I thought it was time for a change so I decided to treat myself to a brand new IKEA Flisat dollhouse for this project.
The main reason for the new build was to see how Maileg’s new wallpaper stickers would work inside it. But also, doesn’t every home deserve a little update now and then?
As the Maileg wallpapers have a charming, vintage cottage vibe, I decided to go full "Cottagecore". If you’ve never heard of Cottagecore, it’s a dreamy, whimsical aesthetic inspired by rural life. Think floral prints, cream-painted wood and a general feeling that your mice might enjoy jam-making and gentle embroidery when no one’s looking!
This new house project also gives me the perfect excuse (as if I needed one!) to try out some new pieces in my mouse house and show you how beautifully Maileg mouse-size furniture works inside the IKEA Flisat dollhouse.
I’m also trying something else new. In my previous house renovations I've removed the dividing wall on the ground floor to create an open-plan space. But this time, I’ve decided to leave it in place to create a separate living area and kitchen instead. Let’s see how that goes…
So, let’s get started on my IKEA Maileg mouse house new build.
An introduction to the IKEA Flisat Dollhouse
Firstly, a quick introduction to the IKEA Flisat dolls' house. Technically, the Ikea Flisat is a basic wooden shelf shaped like a house. But it's so much more than that! Its simple design means it can be anything your child imagines it to be. It has no front, making it perfect for little hands to reach in and play from different angles. It doesn’t take up much space, so it fits nicely into most rooms, and its minimalist style makes it a great blank canvas for customising.
It's also super affordable, even though the price has crept up since my first build; it’s now around £35. So if you're just starting out with miniatures and dollhouse play, the IKEA Flisat is a great way to dip your toes in without a big commitment. It’s ideal for seeing whether your child actually enjoys this kind of play before investing in something bigger and more costly, like the Maileg Farmhouse or the House of Miniature.
Thinking ahead to the Maileg furniture
I’ll talk more about furniture and decoration later, but before you start building your IKEA dollhouse, it helps to plan how you might use each room - and which Maileg pieces you might want to furnish it with. For this project, I knew I wanted to keep the downstairs dividing wall in place so I could create a separate kitchen and living room on the ground floor. However, if you know you’d like to have a kitchen/dining area as well as a sitting area, for example, it would be best to leave out the downstairs wall in order to create an open-plan area on the ground floor.
If you’re planning your own Ikea dollhouse, our Maileg mouse-size furniture page is a helpful place to start as it's organised by room - so you can browse furniture ideas before you decide on your layout.
Browse Maileg mouse furniture by room
Preparing to build the Ikea Flisat Doll's House
While the actual mechanics of putting the IKEA doll’s house together aren’t especially difficult (there’s no complicated DIY or tools involved) it’s the figuring out what goes where that can be a little confusing. The pieces all look quite similar at first glance, and the instruction booklet isn’t exactly crystal clear (classic IKEA!). It’s very easy to end up scratching your head, flipping bits of wood back and forth and wondering if you’re about to attach the roof upside down!
To make life easier, I started by laying out all the pieces and matching them up with the steps in the instruction booklet. I labelled each part with a letter using Washi tape. Washi tape is brilliant for this because it peels off cleanly and doesn’t leave any sticky residue behind. Then, I jotted those same letters onto the steps in the booklet, so I could see at a glance which piece was which. It made the whole assembly process so much smoother, and saved me a lot of second-guessing later on!

I also planned in advance which pieces I wanted to paint or wallpaper, and marked those too. I figured it would be much easier to paint the interior walls before assembling the house so there's no fiddling about with masking tape or trying to paint around wallpaper later!

The Maileg Wallpaper Stickers
Maileg do a set of wallpaper stickers designed to fit their Mouse Hole Farmhouse (and another set of wallpaper stickers for the Mouse Hole Farmhouse annexe) and I wanted to see if these Maileg wallpapers would work in the IKEA Flisat doll house

The wallpaper pack for the Maileg Mouse Hole Farmhouse consists of seven stickers custom-made for the Farmhouse walls. You simply peel off the backing and stick them on.
A word of caution: the glue is very sticky. If you make a mistake, it will leave a residue, and you can’t re-use the sticker. So if you’re building your doll's house from scratch, it's best to stick the wallpaper on before assembling the house. It will make it easier to apply accurately.
Alternatively, if you are intending to wallpaper a doll's house that’s already built or you want the option to change things around in the future, you might consider not peeling the backing off, and instead attaching the wallpaper using something like Blu Tack or a thin adhesive such as PVA glue.
Not all of the Maileg wallpaper pieces are large enough for the IKEA doll's house. I actually used two packs because there’s only one piece wide enough to go across the full back wall. By the way, in case you're wondering, the wallpapers for the annexe are simply too small to use in the IKEA house, unfortunately.
I only wallpapered the back walls, not the side walls. For those new to the IKEA dollhouse, it might take a while to figure out which piece is which, but you can easily identify the back walls - they are the two white rectangular pieces: the thin white piece is the ground floor, and the thicker white piece is the top floor. There’s also a triangular piece that forms the top of the roof, which I didn't wallpaper in my project.
To apply the wallpaper, I figured out where the dividing wall would sit on each floor and drew a faint pencil line as a guide. I stuck the wallpaper on (carefully!) then flipped the piece over and trimmed the excess. I used a craft knife for crisp edges, but these are very sharp so use whatever tool you’re most comfortable with, whether that’s a knife or just scissors. I found that applying the wallpaper stickers as per the instructions does give a really lovely, smooth finish.

Painting my Ikea Maileg Mouse House
So now it's time to paint the dolls house. I always use eggshell paint for my dollhouses because it’s hardwearing and has a soft sheen that suits miniature interiors beautifully. I normally choose Farrow & Ball Estate Eggshell, simply because I like their colour range. But of course, you can use any brand you prefer.
In previous projects, I’ve tended toward cool whites and greys, but this time I wanted something warmer to match the Maileg wallpapers, and to suit the Cottagecore theme I’d decided on for this build.
I painted the interior and exterior walls in Farrow & Ball New White (No. 59), apart from the top floor dividing wall which I painted with Farrow & Ball Nancy's Blushes (No. 278). I left the floors and the underside of the roof unpainted for contrast.
I didn't sand or prime the house before painting, and it turned out just fine. However, that’s not to say you shouldn’t! Prepping the surface properly would most probably give you a smoother finish.
Shop for Maileg's wallpaper stickers here
Building the Ikea Flisat Dolls House
After painting the interior walls and wallpapering the back walls I put the house together using the dowels, screws and Allen key provided. The construction was made simpler by having already identified and labelled the pieces. Once I'd put the main part of the house together, I finished painting the exterior walls before putting the roof on.

Adding the finishing touches to the Ikea Dollhouse
Once the house was assembled and painted, I made a few homemade accessories to decorate it: some pictures for the walls and a garland. It's fun to make some things yourself as it's inexpensive and adds a truly personal touch to your Maileg mouse family's home.
For the pictures I bought some inexpensive wooden frames from a dolls house shop (these are for grown-up dolls house enthusiasts and not suitable for children) and cut out some bits from the packaging of the Maileg wallpapers and put them in the frames. I left some of the frames in bare wood and 'painted' some of them with a black Sharpie.


I also made some miniature art in the style of a magnetic poster frame. This was super simple - I just trimmed two matchsticks and glued them onto a picture that I'd cut out of an old Maileg catalogue.

Next, I made a pom-pom garland by threading some 7mm craft pom-poms onto a piece of cotton thread, selecting the pastel coloured pom-poms to suit my decor.

I even made a home-made wall hanging by attaching a long matchstick to a small Maileg flower rug.

With all the finishing touches done, it was now time to begin furnishing the dolls house.
Adding the Maileg Furniture

Now for the fun part - furnishing the house. I’ve used mouse-size Maileg furniture throughout this build, which works perfectly in the IKEA Flisat dollhouse. You can browse the complete range of Maileg mouse-size furniture room by room here: Browse Maileg mouse furniture by room
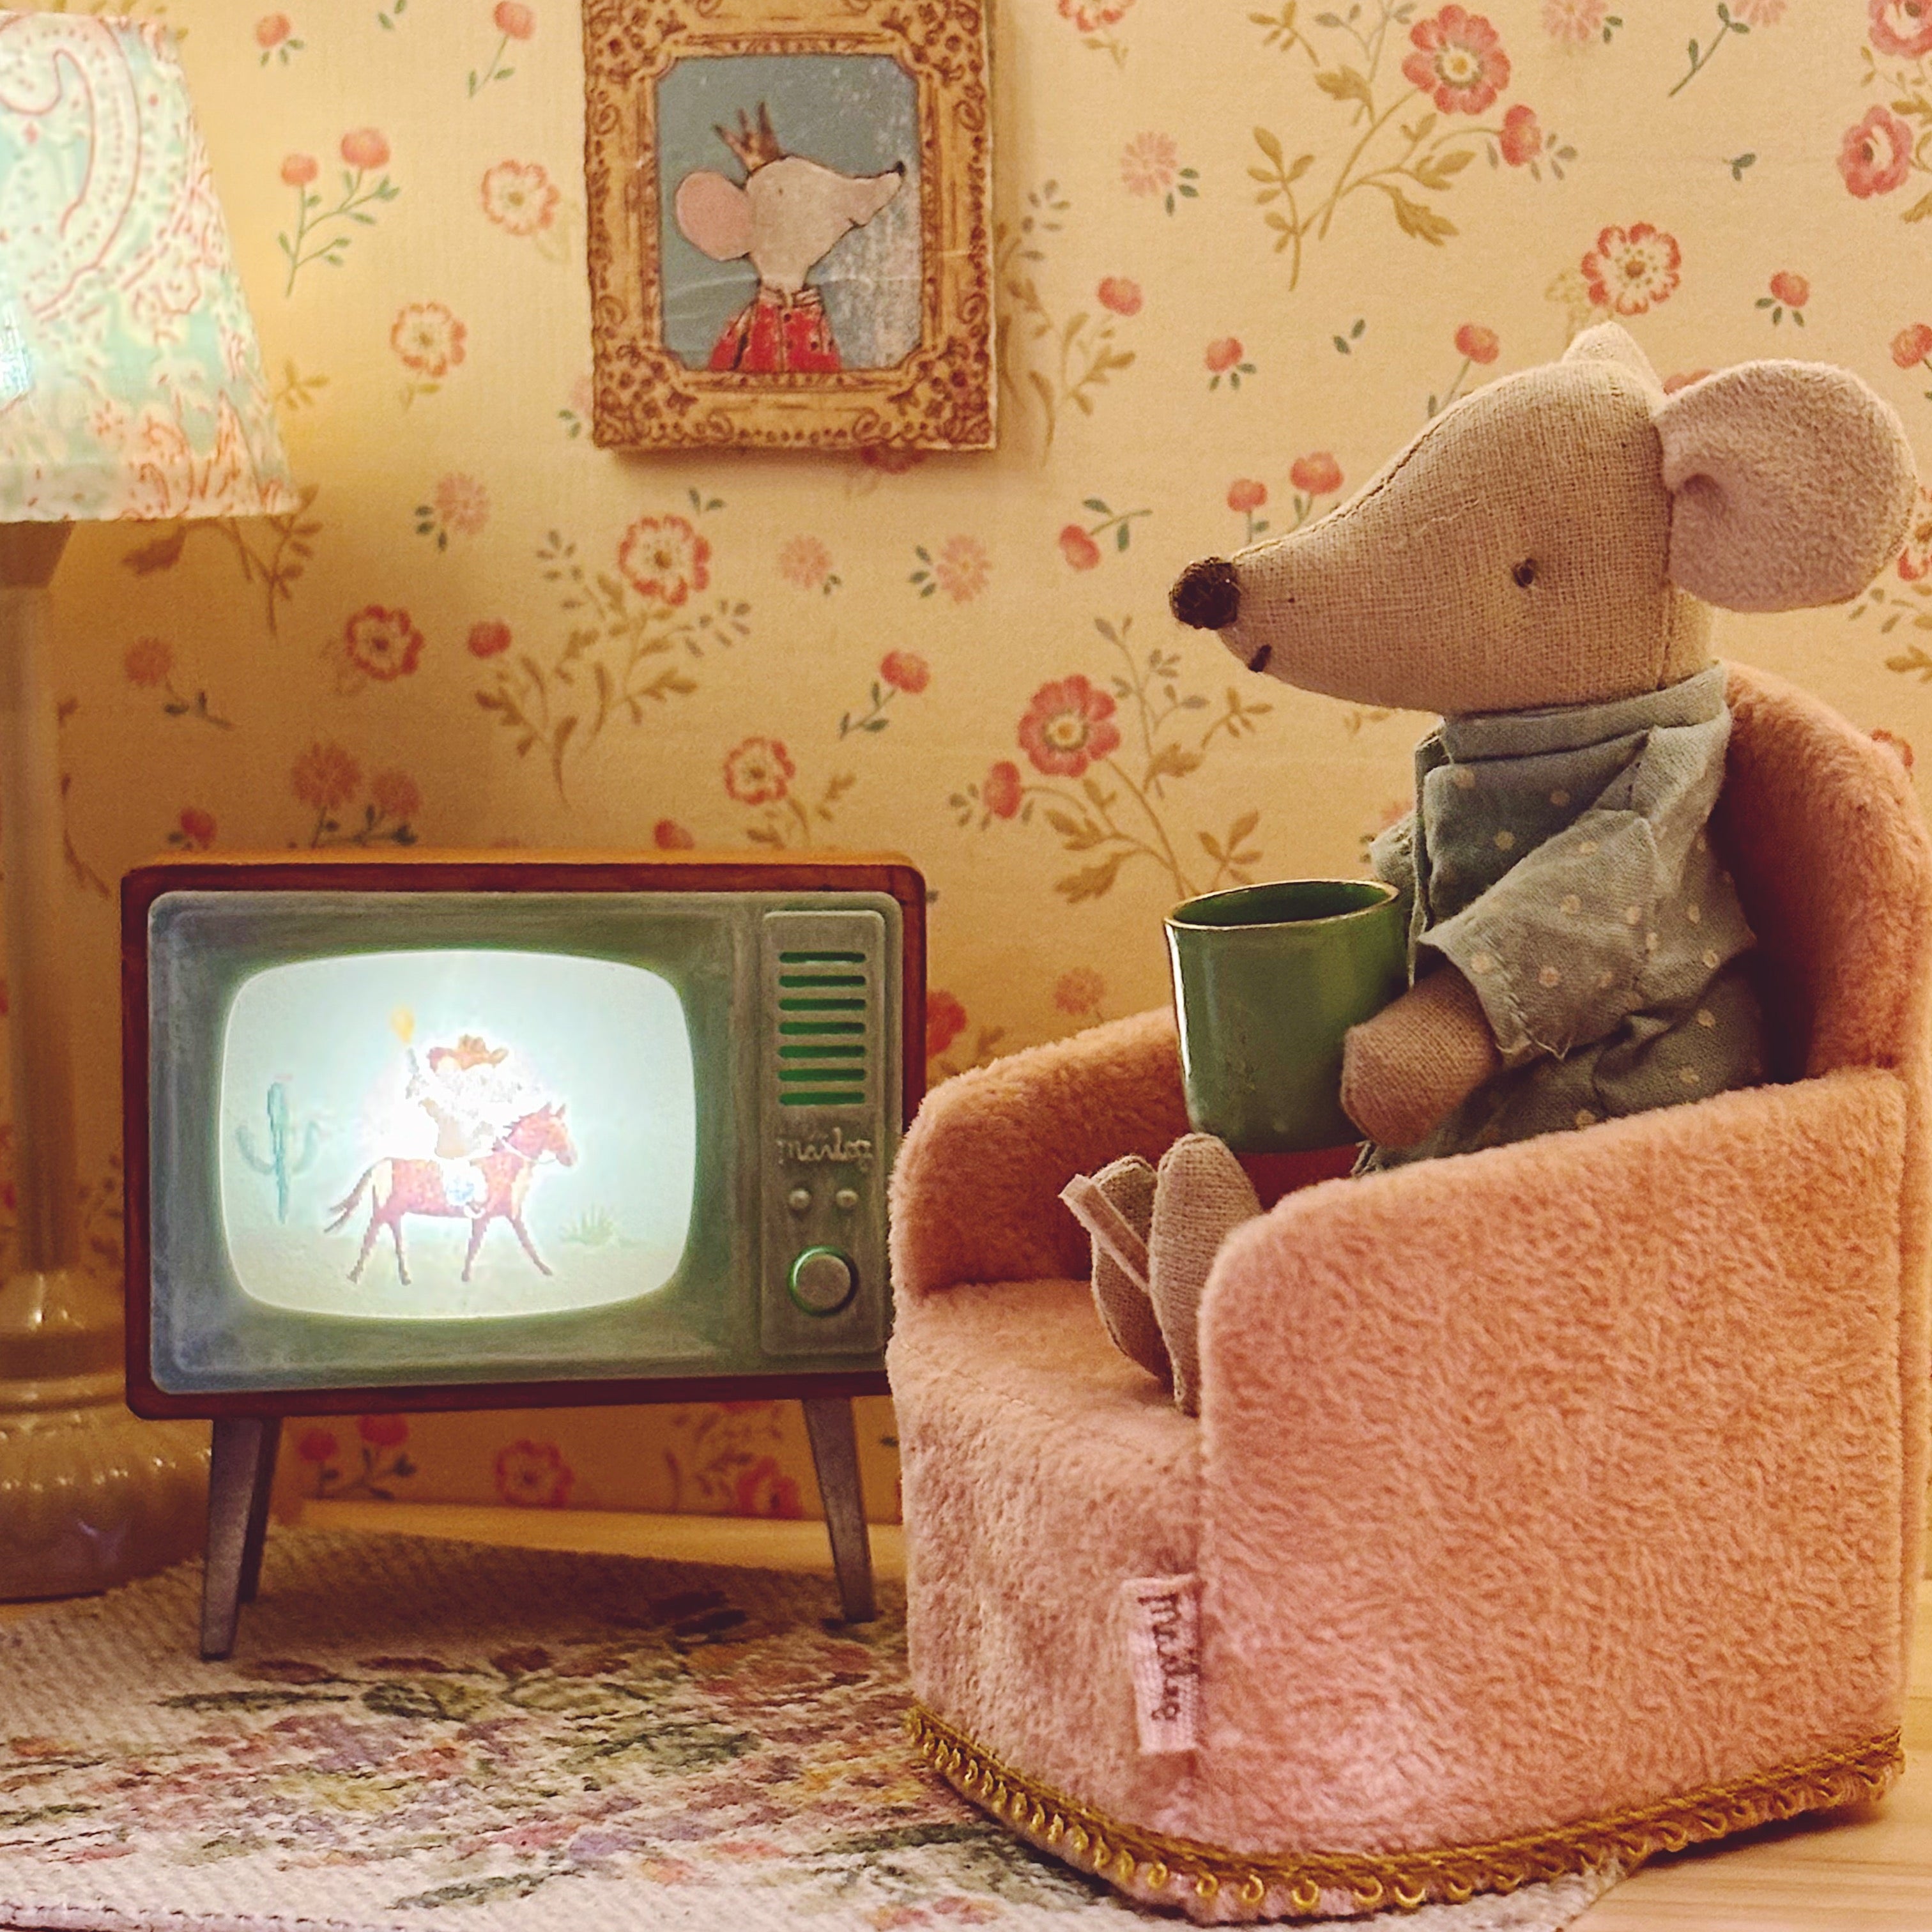
Maileg Living Room
I turned the bottom left-hand room into a cosy little living space, complete with a rose-coloured armchair and a floor lamp . The table and stool set make a perfect coffee table and side table – just the spot for a tiny tea-and-cake moment. The vintage-style pictures created from the wallpaper packaging add a super cute touch.

You can browse all of the Maileg living room furniture for the IKEA Flisat house here
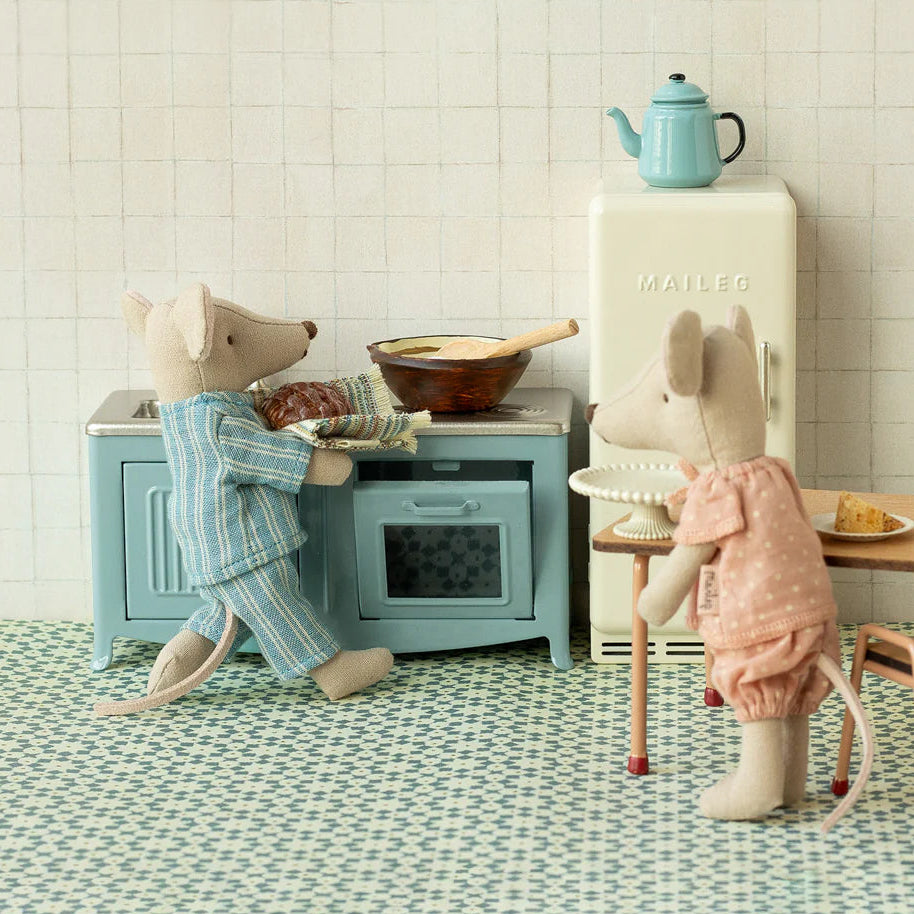
Maileg Kitchen

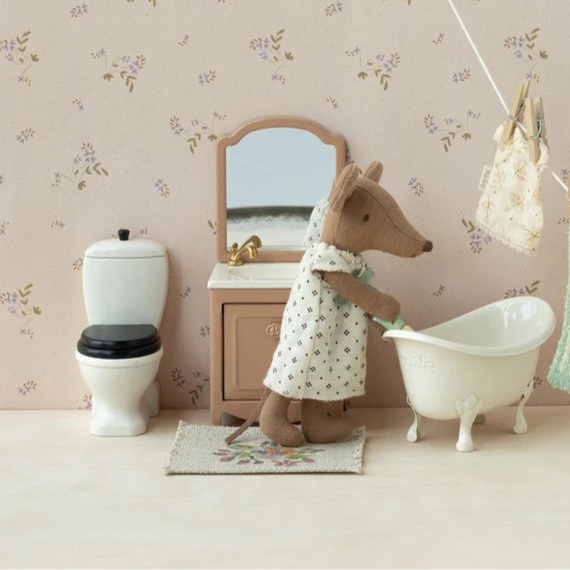
For the kitchen I used the Maileg kitchen in light brown. This colour is no longer available but it comes in three alternative colours: dark green, mint and blue. This is an AGA-style oven with a built-in sink, and it even comes with a little loaf of bread! Baby Mouse is still far too tiny for a big chair, so he’s got his own high chair to sit in. The Maileg large flowers rug adds a cosy touch, and the miniature watering can adds to the cottage kitchen atmosphere.
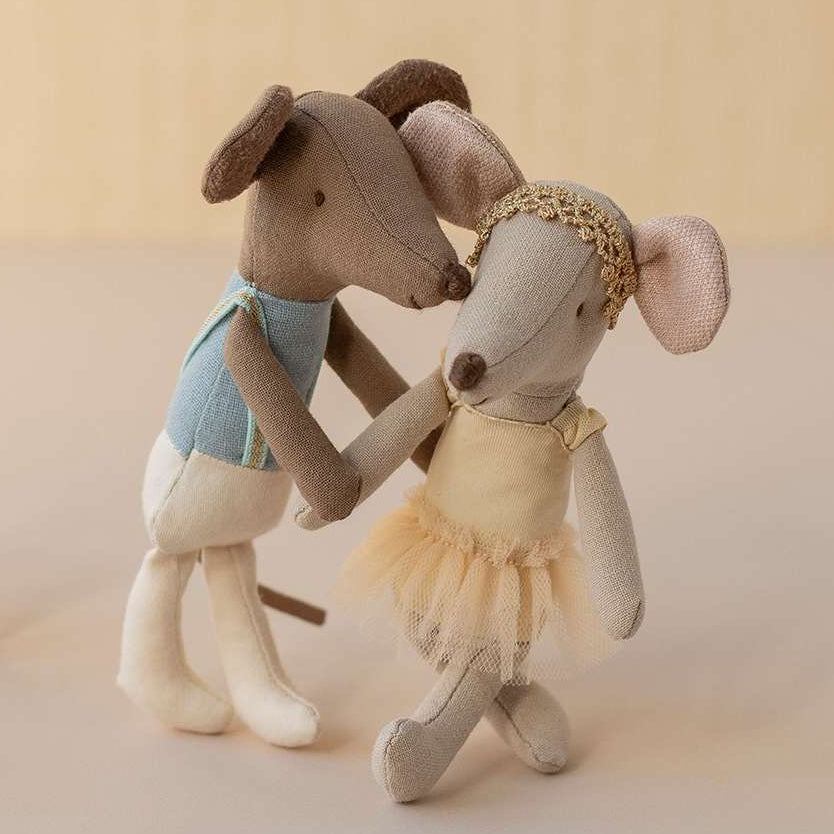
Maileg Bedroom

The bedroom is my favourite room in the dolls’ house! I’ve furnished it with the vintage bed in mint and closet in light rose. Both of these work beautifully with the pinks and blues of the Maileg wallpaper.
You can see all the Maileg bedroom furniture that fits the IKEA Flisat house here.
And that’s a wrap on my IKEA Maileg mouse house makeover 2.0. It’s been such a fun and creative project and I hope it’s inspired you to have a go at creating your own. After all, who says a new build can’t be full of charm and character?
There's lots more information and inspiration in our Guide to using the IKEA Flisat dollhouse with Maileg where you can learn which Maileg mice and furniture fit the IKEA house, along with tips on building and decorating it. Or, if you'd like to see all the mouse size furniture together, you can browse Maileg mouse furniture for the IKEA Flisat here.
Let me know what you think. If you have a specific question about this IKEA Flisat Maileg mouse house project, feel free to pop me an email at hello@yoyoandflo.com.
You can read more blog posts here:
Read Part 1 of our Ikea Maileg Mouse House Hack - Building the Mouse House
Read Part 2 of our Ikea Maileg Mouse House Hack - Painting the Mouse House
Read Part 3 of our Ikea Maileg Mouse House Hack-- Wallpapering the House
Read Part 4 of our Ikea Maileg Mouse House Hack - Adding the Maileg furniture
Read Part 5 of our Ikea Maileg Mouse House Hack - Renovations
Comments
Hi, I thought the rug wall hanging was a genius idea, will definitely be making that.😁